Sunday, April 29, 2012

New Work In Progress, Color Pencil Tip of the Week & Resource of the Week

Hey Everyone!
I hope everyone is having a great weekend. I have been having asthma problems so I haven't been going outside very much. They are plowing all the fields around us, which is making it worse.
However, I did step outside to see what God sent us the other day and today. A turkey. A Naragansett Turkey actually. It's definitley domesticated. I figure it must belong to one of the farmers nearby. Anyways, my two cats are trying to attack it, so I have been having to keep the little devils inside. I threw out some bird seed for it and it seems to like that, but I have no place to keep a turkey, other than an old run down chicken coop that is overrun by blackberry bushes. A very pretty bird. Wish I had a better camera to take a picture of it, but alas my camera bit the dust a few months back.


Work In Progress
So, I started the Mother's Day Gift piece. Doing this one completely in color pencil. I am presently working on the background right now.
 I had to scan it in two sections, as it is way to big for my scanner. So, I tried my best to get rid of the shadow in the center because of the two separate scans, but just couldn't. If anybody knows a technique to get rid of the shadow,  please let me know. I am working from pretty old photos, so I hope I can capture the likeness of each subject well.


Finished Work

So finally did the final touches to the first panel. I might make some more changes to it, as I begin to work on the second panel, to blend the two together. I will be selling them as a set.

Done in color pencil using warming board technique and eraser technique.


Color Pencil Tip of the Week

This week, I want to share with everyone the different pressures I use, when applying color pencil. I mainly use light to medium pressure, in building up my layers of colors. I wanted to show an example of what the pressures look like. As you can see from the example, the heavy pressure clearly differs from the light pressure.
The advantages of using light to medium pressure, verses medium to heavy pressure is the following:
  • more control over the area you are working on
  • easier to erase mistakes
  • less stress on your wrists and fingers
  • less wax bloom build-up
The disadvantages are the following:
  • longer time in completing a work
  • can lose tooth of paper, due to many layers


Resource of the Week

I stumbled upon Rhonda Bartoe's blog this past week. Be sure and check out her posts some wonderful color pencil tips

Bartoe Art - Color Pencil Mixing
http://bartoe-art.blogspot.com/2008/12/colored-pencil-color-mixing.html


Hope you all have a great week!
Hugs and Happy Creating!
Carol


Saturday, April 21, 2012

Work in Progress, Colored Pencil Tip of the Week & Resource of the Week

Hello Everyone!
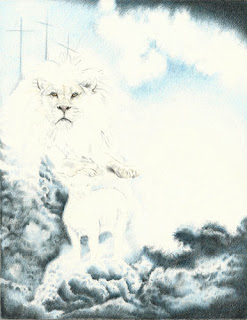
Today is a beautiful day outside. So, instead of working on my current work-in-progress, I am going to work outside in the garden.  But, I am nearly done with this art piece; I have only a few more touch-ups to complete. Originally this piece was supposed to be for a ceiling mural I was going to paint for our church, but due to the age of the building and other matters, the church board decided against it. This piece was done with colored pencils on Rising Stonehenge.


Colored Pencil Tip of the Week


This week I am going to share with everyone how I layer my colors to achieve another color. For this example, I start off using light to medium pressure, applying a layer of Greyed Lavender as shown below, then on top of that layer, I add a layer of Caribbean Sea. Next, I add a layer of Slate Grey, and then I add a layer of Cool Grey 70%. I repeat the process of the same layers of colors. Sometimes I will apply as many as 3 to 4 layers of the same colors until I get the value and color I need. I always use light to medium pressure. I never use hard pressure unless I am burnishing with a light color over the top of these layers of colors. I always start with the lightest colors first and work my way up to the darker colors by building up my layers.
After I have applied these layers of colors, I usually leave them as is or apply a solvent, colorless blender marker, or pencil, depending on the subject I am creating. But as you can see, the greyed lavender shows through the other layers of colors. It's a lot like mixing paints to achieve the color you want, but you are layering different colors instead to achieve a particular color.


Resource of the Week


Pinterest
http://pinterest.com/

A social network site that has been getting more views than google+, linkedin and youtube combined.
Some huge controversy over Pinterest in regards to copyright issues though, and I can see the concerns, when artists are not given credit. I have a Pinterest account and I am using it to share my artwork and photography and to share some of my favorite artists works with credit. Pinterest is also a great way to gather some ideas and inspirations for creating some new works. Add me if you like  http://pinterest.com/mooresart/


I hope you all have a great weekend and happy creating!


Saturday, April 14, 2012

Work In Progress, Color Pencil Tip of the Week, & Resource of the Week

Hello Everyone!
Things have been hectic as of late and I haven't had much time to work on my newest work in progress. So in my last blog post, I mentioned how I constructed my own icarus board by using an old light table board and heating pad. The technique is really quite fun. I am going through my pencils way faster though and I have to brush away debris more often, but the rich colors one can achieve are wonderful. I have been layering down a few layers of colors and then I place my work on top of the heated board and then blend the colors with a lighter color. I also have just tried blending and layering the colors while on the heated board, which really has a quite vivid rich effect. It's a wonderful technique and I urge everyone to either purchase an icarus board or make up your own. It's quite fun. So here is the latest update on my recent work in progress.


Color Pencil Tip of the Week
So I have been asked before, how do I get such realistic results with my works. Really it's all in blending and layering many different colors. I start off with my lightest colors first, then I work my way up to darker colors. And I always try to start with the background first. As you can sort of see in this work in progress.


Next week, I will show a step by step in how I layer different colors to achieve a particular color.

Resource of the Week
A great resource for all color pencil artists on Color Pencil Tools and Techniques by artist Sheri Lynn Boyer


Hope you all have a great weekend!
Happy Creating!
Carol


PictureFrames.com


Wednesday, April 4, 2012

New Work In Progress, Color Pencil Tip of the Week and Resource of the Week

Hi Everyone,
My computer died last week, so I wasn't able to post on my blog any updates. Presently, using my husband's laptop til I can get a new laptop. Fortunately, I had most of my important files all backed up on my external hard drive, but I really miss my computer as it had all my photo shop programs and web site developing programs. And I miss my Firefox. I donot like IE but must live with it til I get my own computer.
Anyways, starting this week I will be sharing color pencil tips and if you head over to my facebook page you can participate in a free Easter Giveaway http://www.facebook.com/MooresArtsGallery


New Work In Progress
A new Easter piece. I am working on the background right now and I am not sure on the title yet. I am hoping to get it done by Sunday, if time allows. The medium is color pencil.


Color Pencil Tip of the Week

Some of you may be familiar with Ester Roi's Icarus Board http://icarusart.net  It's a great product or tool for using with color pencils, crayons, oil pastels or encaustics. Well, since my budget is limited I have invented my own homemade icarus board by using my lap easel, heating pad and plastic sheet board that use to be on an old lighttable of mine. I can set the temperature to either low, medium or high. It is a great way to blend and melt the colors together creating vibrant colors. As you can see, in the above work in process, using this tool, I was able to take an eraser over the colors creating some interesting textures and effects in the clouds. So if you can't afford an Icarus Board, I urge you to try and come up with a homemade board and explore and experiment, it is so much fun.

Resource of the Week

A great color pencil study excercise. Be sure and check out her other color pencil excercises.

http://www.mmwindowtoart.com/drawing/colorstudy2pencil.html


I hope you all have a wonderful Easter Weekend!

Take Care!
Carol Moore  

    ✿╔╗─╔╗
✿║║─║║
✿║╚═╝╠══╦══╦══╦╗─╔╗
✿║╔═╗║╔╗║╔╗║╔╗║║─║║
✿║║─║║╔╗║╚╝║╚╝║╚═╝║
✿╚╝─╚╩╝╚╣╔═╣╔═╩═╗╔╝
✿───────║║─║║─╔═╝║
✿───────╚╝─╚╝─╚══╝
✿╔═══╗─────╔╗*.:。✿*゚゚・✿.。.:*
✿║╔══╝────╔╝╚╗✿.。.:* *.:。.✿
✿║╚══╦══╦═╩╗╔╬══╦═╗
✿║╔══╣╔╗║══╣║║║═╣╔╝

✿║╚══╣╔╗╠══║╚╣║═╣║
✿╚═══╩╝╚╩══╩═╩══╩╝


Premier Colored Pencil Sets set of 48

Premier Colored Pencil Sets set of 48

These soft, thick lead pencils have been enhanced with a better bonding process, providing professional, artist quality color while resisting breakage. They provide high blendability, excellent lightfastness, and a smooth laydown that will not scratch.Unmatched in brilliance, Prismacolor Premier Colored Pencils are perfect for illustration, renderings, landscape, and portraiture. The pencils are non-toxic, AP certified, and do not contain rainforest wood.