Wednesday, July 5, 2017

New Colored Pencil Work & Brush and Pencil Colored Pencil Products


Occasionally, I like to dabble with new art products. At Alyona Nickelsen’s Brush and Pencil http://www.brushandpencil.com website’s store she offers some new products for colored pencil artists they are: Colored Pencil Titanium White, Colored Pencil Powder Blender, Colored Pencil Touch-up Texture, Advanced Colored Pencil Texture Fixative, and Advanced Colored Pencil Final Fixative all of which are archival and non-toxic. For those interested, Alyona offers a paid 6-month membership you get access to various numerous resources for colored pencil artists.


Before I show and explain my demonstration, I like to give a little information about the products I purchased and received as a gift to try from Brush and Pencil and the tools I purchased and used to apply the materials.


The Colored Pencil Titanium White is my favorite product out of all Brush and Pencil products. It is a loose archival, non-toxic, opaque powder, and can be combined with Brush and Pencil’s other products. It is great for creating soft clouds, fog, haze, stars, other soft effects, or highlighting the whitest of areas of your art project. You can apply this product with a sponge applicator, paint brush, or a small sponge. It is correctable by lifting it off the surface of the paper with a putty or eraser. You can get so inventive and imaginative with using this product the ideas are limitless.


Colored Pencil Titanium White
brushandpencil.com

In a demonstration, artist, Lisa Lachri, from Lachri Fine Art, mixed the Colored Pencil Titanium White powder with the Colored Pencil Touch-up Texture to achieve a very white opaque mixture. I tried this technique, and I applied it with a paintbrush. It really made areas very bright where I applied it, and I was able to have far more control in applying the product to certain areas of my subject. However, once I applied it in this manner and the product dried, it was very difficult to remove. Yet, you can apply colored pencil layers over the painted area to fix or conceal the area, but it can take several layers of color to conceal the area. Check out Lisa's video below on this demonstration.


The Colored Pencil Powder Blender is a loose translucent powder, archival, and non-toxic that is used to blend colored pencils. This product works best on toothy surfaces such as Canson Mi Tientes Touch Sanded Pastel Paper or UART 500 or 600 Grit Sanded Paper. The product also works well on gessoed surfaces. It takes very little amount to apply to the surface, and there are several ways to apply the powder. You can apply and blend the product with a sponge applicator, paintbrush, short stencil brush, sponge, makeup sponge, or wear a finger protector and use your finger. 
The Powder Blender makes it an ease to erase layers of colors. However, once you have applied spray fixative, you cannot erase the layers of color. 


brushandpencil.com


In addition, I experimented with this product using several brands of colored pencils and watercolor pencils. I have discovered the Powder Blender seems to work best with the oil-based Faber Castell Polychromos Colored Pencils and the wax-based Prismacolor Verithins Colored Pencils. 
When using oil-based colored pencils you do not need to apply the Powder Blender first to the surface of the paper. However, when using wax-based pencils you must apply the Powder Blender first before applying any layers of colored pencil to the surface of the paper. After you have applied the layers of color to the paper's surface, you need to apply the Powder Blender again.
When using wax-based pencils, it also can be difficult to blend and get a smooth even appearance, especially if you have applied any layers with heavy pressure. I really struggled with this and one thing I discovered quickly, is if you did not apply the powder blender first and/or if you applied the color layer with heavy pressure the pencil layer would bind up displaying a gritty appearance (see image below). I tried dipping my stump or stencil brush into the powder blender to blend this out, but the tooth of the paper really wore down quickly. 


The Colored Pencil Touch-Up Texture is a fast drying, archival, non-toxic clear liquid. You want to shake it well before you apply it. You can apply this product to small areas to build up more tooth to the surface of the paper. You should allow the area to dry about 15 minutes before working on the area. 
I used this many times in areas where I needed more tooth because I tried blending out the wax-based pencil's gritty appearance with a stump. This worked great in providing more tooth to the surface of the paper.

brushandpencil.com


The Advanced Colored Pencil Textured Fixative is archival, non-toxic, non-yellowing, UV-resistant and fast drying fixative. It can be used on colored pencil artwork that has been applied to rigid surfaces.
I discovered, when you apply this to a non-rigid surface, your paper will end up like a limp curling noodle. So, make sure to tape your paper down to a board to prevent curling.
This fixative is great in that, it provides more tooth to the surface of the paper so that you can keep applying layers of color and it has minimal impact on the colors. However, I have noticed, if you do not shake the can well and hold it at least 8 inches from the paper’s surface, it will create little tiny spots on the surface of the paper. You should allow the area you sprayed to dry about 15 minutes before working on the area.
brushandpencil.com


The Advanced Colored Pencil Final Fixative is archival, non-toxic, non-yellowing, UV-resistant and fast drying. Once this is applied you cannot erase. You should allow the area to dry about 15 minutes before adding anymore fixative.The Final Fixative also provides a finish layer to the work and allows one to frame the artwork without glass.
brushandpencil.com


Colored Pencil Powder Blender Experimentation

This is the first experimentation using Prismacolors, Derwent Coloursofts, and irojitens on acrylic gessoed paper. The tools I used to blend with were the sponge applicator, stump, and brush. I applied the powder blender first for all wax-based colored pencils.


This is the second experimentation using oil-based Faber Castell Polychromos, Albrecht Durers watercolor pencils, and Derwent watercolor pencils on acrylic gessoed paper. The tools I used to blend with were the sponge applicator, stump, and brush. I applied the powder blender first for all wax-based colored pencils.


This is the third experimentation using Faber Castell Polychromos colored pencils, Prismacolor Colored Pencils, Albrect Durer watercolor pencils, and Derwent watercolor pencils. To blend, I used a sponge applicator on gessoed Stonehenge paper. I applied the powder blender first for all wax-based and water-based colored pencils.

This is the last experimentation using various wax and oil based colored pencils and a sponge applicator on gessoed Stonehenge paper. I applied the powder blender first for all wax-based colored pencils.

New Colored Pencil Work Using Brush and Pencil Products

First, may I recommend to a beginning artist, never create a large piece of art when you are experimenting with new art products. When experimenting with new art products, it is much easier to create a small piece of artwork that way if you make any mistakes you do not have a lot of time and expense invested into the art piece.
The image below is my Colorless Blender Powder experimentation on Canson Mi Tientes Touch Sanded Paper. The title of it is "Aurora".  The paper size I used was 22.0” x 30.0”. The reference used is from http://darkmaiden-stock.deviantart.com/art/Sitting-Princess-4-18459797
I made many errors experimenting with these new products and attempting this new technique. It is definitely something you cannot master overnight. I did have the opportunity, since this was such a large piece, to experiment with all my colored pencil brands and various tools on this art piece, as I wanted to see the effects of how each pencil blended with the powder, to see how the pencils blended with each other, and to see which blending tool worked best.
"Aurora"

As I explored and experimented, I learned that some blending tools worked better than other blending tools. In addition, I learned that some blending tools can degrade or damage the tooth of the paper quite rapidly. I also learned not all brands of colored pencils/watercolor pencils are powder blender friendly.
Tools I used in experimenting with this piece: Paint brushes, stencil brushes, stump, sponge applicators, electric eraser, stick eraser, and finger protectors.


Step by Step using Colored Pencil Powder Blender, Colored Pencil Titanium White, Colored Pencil Touch-up Texture, Advanced Colored Pencil Texture Fixative, and Advanced Colored Pencil Final Fixative.

I must admit, in the end, I really liked how the Prismacolor Verithins worked with the Colored Pencil Powder Blender the best. Verithins are not the top of the line artist grade quality, nor do they have a huge color assortment, but they blended well with the powder blender. Faber Castell Polychromos ended up being my second favorite. I have much more to learn, experiment and explore using the powder blender. I am far from being a master at using these Brush and Pencil products, but I look forward with eager anticipation of using them on future art pieces.

The outcome and preferences will be different for each artist as they experiment and explore with these wonderful Brush and Pencil products and the artistic opportunities are endless in creating works of art with these products.
Keep on Creating!
Have a blessed week!
www.mooresartgallery.com


Thursday, February 23, 2017

New Colored Pencil Artwork and Colored Pencil Resource for the Week

New Colored Pencil Artwork and Updates


Hey all,
Sorry I have not been posting as of late. I have had some health issues and just had surgery on my foot on February 3. I have been pretty much out of it these past few weeks. I will be laid up for another 3 weeks and then I have to start Physical Therapy. I am improving day by day, but I am going to have to teach myself how to walk on my foot all over again. So, I have a long hard road ahead, but I know with God by my side I will be up and walking and going on hikes again by June. 
I plan on hitting the colored pencils again either later today or tomorrow. I wanted to share my last colored pencil piece I finished and my latest work in progress I started in first part of January.

New Work


This is my newest work that I finished up in November. Wow it has been a long time since my last post. Originally I was going do a solid watercolor border around this but I changed my mind and expanded the details of the amethyst outwards.
Title: Amethyst Butterfly
Medium: Colored Pencils and a smidge of watercolor along the edge
Size: 9 x 12

Surface: Stonehenge 
References: http://blacklotus06stock.deviantart.com/ and http://nickistock.deviantart.com/


This next piece is a Christmas piece I did a few years back and I was never completely happy with it, so I reworked the background and the angel. I can say now that I am much happier with it. However, the scan does not show the irridescent acrylics.
Title: The Star of Bethlehem
Medium: Colored Pencil, Watercolor pencil, acrylics
Surface: Strathmore Aqaurius II Cold Press
Reference: Own imagination and http://tracie76stock.deviantart.com/


New Work In Progress


This piece is from one of my sketchfest pieces I did a few years back. I am using Prismacolors and Irojitens for detail. I am also using Copic colorless blender marker and an electric eraser for blending and textures.


Artist of the Week


Alyona Nickelsen is a very talented award winning colored pencil artist. She has been featured in many artist magazines and she has invented the Colored Pencil Blender Powder, Titanium White and her own Colored Pencil Fixative. Please check out her website. You will not be disappointed.
I just got my first Polychromos a few weeks back and I plan on, after finishing my newest work in progress, using them and will be using Alyona Nickelsen's blending powder and fixative. I can't wait to give this a try. 

Colored Pencil Resource of the Week


Lisa Clough shares here viewpoints and differences between Prismacolor Vs Faber Castell Polychromos colored pencils. 


Keep on Creating!
Have a blessed week and weekend!

Saturday, September 24, 2016

Using Colored Pencil on Ampersand Aqua Board Osprey Colored Pencil Artwork Finished

New Work

So, I like to explore and try experimenting with different surfaces when using colored pencils. So I decided to experiment with Ampersand Aqua Board. It has an acid-free textured clay surface that supposedly can absorb watercolors just like watercolor paper. What piqued my interest in using this type of surface, is that your artwork can be sealed with a sealer or coating and it doesn't have to be framed under glass. How nice that would be, not to mention more affordable. As in my last blog post, I thought in order for me to use this surface I thought if I primed it with Brush and Pencil's Colored Pencil Textured Fixative the colored pencil might adhere better to the surface. After finishing this artwork, I would not recommend this type of surface when working with colored pencils, mainly because the surface of the aqua board makes it very difficult to apply many layers of colors using colored pencils. In addition, the surface makes it difficult to complete a lot of detailed work using colored pencils. It also really eats away the colored pencil leads quickly. Ampersand Aqua Board, however, is definitely well suited for watercolors and gouache.
Title: Osprey
Drawing/Painting Surface: Ampersand Aqua Board
Reference Photo: My own


Artist of the Week

I stumbled across this UK artist in reading Making the Mark's Blog on Derwent's Exhibition Winners. Artist, Sarah Gillespie, had an entry that was mind blowing. All the little details of crosshatching. It was just an incredible piece.  You can check out her pencil, graphite and charcoal artwork here http://www.sarahgillespie.co.uk/

Colored Pencil Resource of the Week

Here is a great video tutorial on how to draw a bird by the virtual instructor using Derwent Colored Pencils


Keep on Creating!
Have a blessed weekend!


Monday, August 29, 2016

Colored Pencil Cat Drawing, Ampersand Aqua Board and Colored Pencil Resource

Colored Pencil Cat Drawing

I finally finished up this cat portrait. I forgot how tedious and time-consuming fur can be. I did not have a great photo to work from, a lot of guesswork on the white part of the fur. Arden was my daughter's cat who disappeared during a  rainstorm.
Title: Arden
Medium: Colored Pencil
Paper: Canson Mi Tientes
Reference: Own

Arden


Ampersand Aqua Board

So my next project experiment is using watercolor, watercolor pencils and colored pencils on Ampersand Aqua Board. First I have to say, the board's surface does not have the tooth to hold a colored pencil at all. I tried applying a layer of Colored Pencil Texture Fixative to the surface, to see if it would help add some tooth to the surface of the board but, unfortunately, it did not help. However, once you lay down a few layers of watercolor, you can apply colored pencil on top of the watercolor layers. I am using Copic Colorless blender to blend the watercolor pencils and colored pencil. I used Yasutomo Pearlescent Watercolors, Derwent Watercolor Pencils and Prismacolor Colored Pencils on the sky.
So here is the beginning stages of an Osprey I am working on. The reference photo is my own.
I will be showing updates as I progress..
.

Falcon

Colored Pencil Resource of the Week

Artist Lisa Clough gives an excellent demonstration on how to draw hair in colored pencil  http://lachri.com/drawing-hair-in-colored-pencil/ using colored pencil artist tools - Touch Up Texture and Titanium White Powder from http://www.brushandpencil.com .


Keep on Creating!


Wednesday, June 29, 2016

New Colored Pencil WIP and Drawing a Cat Colored Pencil Resource

Happy 4th of July

Like to wish everyone a Happy and Safe 4th of July weekend! I have no big plans but just plan on spending time with family.


New Work In Progress

So I started a new colored pencil piece last week. I am working on it in-between design projects. It is a very special portrait to me, as it is of our cat, Arden. He disappeared several years ago during a rainstorm and never returned. It has taken me a long time to finally decide I could draw him and I thought it would be great practice for me to help get back into using my colored pencils again, being as when I was in school last year, I didn't really have a lot of time to do what I love most and that is drawing with colored pencils. 

When I draw fur, I don't have the patience to draw really every line like some colored pencil artists do. I draw mostly the shapes that I see, which gives an illusion of fur. I usually use a lot of various colors. Sometimes, I will use more than 50 colors for one piece. It just depends on the subject and background. For this particular piece, I am using Prismacolors and one of my other favorite brands of  colored pencils Tombow Irojitens. I love Irojitens colors. I am using masking fluid for the whiskers.

I always start off with the eyes. I have been told by other professional artists I should start off with the background first, then work on the body and then the eyes last. I have tried that method before, but I find it easier for me to judge and scale the whiskers and fur with the eyes done first.


Originally, I had every intention using Alyona Nickelsen's products (Colored Pencil Texture Fixative, Powder Blender and she gave me a gift of the final fixative) that I purchased on this piece, however, I totally foobared my attempt. The paper I am using is Canson Mi Tientes on the smooth side. Before I started applying layers of color to this paper, I sprayed a layer of the Colored Pencil Texture Fixative just to see what it would do. This particular fixative, which I have discovered is not meant for regular drawing paper. As you will find out if you buy this product, as I did with experimentation, it sprays on very wet and will buckle your paper as it dries. And you know Alyona, does stress that in her video that the products are not meant for regular drawing paper. I just figured Canson Pastel paper would be okay to use cause it does have a textured surface. Artist, Lisa Clough, had a similar problem and came up with and idea to solve the dilemma by applying some thin watered applications of gesso to the drawing paper's surface, but I only discovered this solution after I started work on this piece. Anyways, I hate to throw away paper, so I did tape this piece down to help straighten out the buckling after I sprayed it.  But really for Alyona's products, you need a more durable thick sanded pastel or gesso paper or a pastel board such as Ampersand Pastelbord. So I plan on using her products using a non-absorbent pastel board or paper and will be giving her products a review on my next piece.
Here is a video by artist, Lisa Clough , giving a demonstration on how to use Alyona's products and a review on Alyona's colored pencil products. These products produce a look very similar to pastels. So real excited to get my paper and using these products.


Colored Pencil Resource

I thought I would share this wonderful demonstration by artist Emmy Kalia on how to draw fur using colored pencils. Her method, which is different than mine, achieves more realistic fur. Enjoy!


Keep on creating everyone!


Saturday, May 28, 2016

Bigfoot Commission Finished, New Colored Pencil Lesson and Review on Marco Raffine Colored Pencils

Happy Memorial Day!

Happy Memorial Day Weekend to everyone! I was just wanted to say thanks to all the veterans and God Bless.


Commission

My latest commission is completed. I used Marco Raffine colored pencils, Prismacolor colored pencils, and iridescent watercolors. The iridescent watercolors do not show up in the scan but the background was done in iridescent blues and colored pencils. Reference was mainly from a photo I took on our trip to Newport, Oregon of the Bigfoot wax image at Ripley's Believe It or Not museum. However, I felt that it looked to zombielike so I made his face a little more realistic.


New Colored Pencil Lesson

Well, I started this piece last spring but school and other clients kind of got in the way of me finishing it. So I hope to finish this up tonight or tomorrow. The free colored pencil lesson will be viewable and accessible on my site later next week. 

Review on Marco Raffine Colored Pencils

So, I completed my recent Bigfoot commission piece using the Marco Raffine 72 colored pencil set that I received a few weeks ago. I only paid $21.99 for the set. Pretty affordable when you are a poor starving artist. 
I decided to compare the Raffines to the brand I normally use which is Prismacolor Professional Grade Colored Pencils. I compared the two throughout the Bigfoot commission process.


First, a little bit about the pencils themselves. They are oil-based colored pencils and are creamy, smooth and blend well. There is presently no lightfast testing done on this brand.

Positive Points: The Raffine colors have 72 pre-sharpened colors to choose from. They blended well with the watercolors and Prismacolors. They also blended and dissolved well with a Copic colorless blender marker. I had no problems layering multiple colors to create fur. However, I would want to test this brand doing a portrait of a person just to see how well colors blend and layer. Colors are easy to erase with an electric eraser.  All Raffiné colored pencils conform to ASTM-D-4236 Non-Toxic requirements.

Negative Points: I did notice that the Raffines have more of an inconsistent pigment than the Prismacolors. They are not as rich as the Prismacolors they are more softer as you see in the image below. If they weren't oil-based, I would say they have more of a waxy pigment due to the softer colors. I thought also that they don't easily sharpen to a real sharp fine point as Prismacolors. Prismacolors I can get to a real sharp point which I like for details. You cannot purchase these pencils in open stock only in sets.


Marco Raffine Colored Pencils

If you are a beginner colored pencil artist or into the adult coloring books then this is a great brand to set you off in the right direction and a great set to add to your colored pencil artist tool box. There might be colors in this set that you may not have found in any other brand set. It's all about the colored pencils and if you love this medium as much as I do, you will continue to create works of art with colored pencils and will find the brand that works best for you whether as a hobbyist or professional.
There are other reviews out there on this brand each with their own perspective and viewpoint you can check them out here:
http://aprettytalent.blogspot.com/2015/07/comparing-marco-raffine-coloring.html
http://la-artistino.com/2015/10/01/marco-raffine-pencils-review/
http://www.aurella-art.com/colored-pencils.html
http://www.aminoapps.com/page/art/8226094/marco-raffine-color-pencils-review

Hope you all have a great Memorial weekend!
Keep on Creating!


Sunday, May 1, 2016

New Bigfoot Commission and Marco Raffine Colored Pencils

New Commission

I haven't picked up my colored pencils in over a year. This week I start working on a new commission for a client of Bigfoot. Of all the years drawing I have never been asked to draw this particular mythical creature. I will be basing it on the Ripley's Believe it or Not Museum Bigfoot display.
copyright © Ripleys Believe It or Not

Making the Mark

There are many artists concerned about protecting their art online. One basic and easy thing to do is to post up only pictures that are 72dpi or small enough that the image quality if increased in size, is very poor.
Here is a  great article by Katherine Tyrrell on how to protect your artwork online
http://makingamark.blogspot.com/2016/04/how-to-protect-your-art-online.html

New Pencils 

So I purchased some new colored pencils - Marco Raffine 72 set. A great buy on amazon and great reviews. Anxious to give them a try and I will be using them on my latest commission piece. They seem to have the same creamy wax base as Prismacolors. Will be providing a further update on this brand.


Hope you all have a great week!
Keep on Creating!

Thursday, August 13, 2015

New Colored Pencil Art Work and Logo

New Color Pencil Art Work

Hi Everyone!
My newest colored pencil art work is now complete. I started this piece quite a few months ago but school kind of took over my life and I just didn't have any time to work on it until now. This is my vision of Miriam from Exodus. I was inspired by verse 8 in Exodus 15 "By the blast of your nostrils the waters piled up. The surging waters stood up like a wall; the deep waters congealed in the heart of the sea."
Title: "Nobiscum Deus"
(latin for God is with us)
Medium: colored pencil, watercolor pencil, and acrylic
"Nobiscum Deus"
New Website Logo
So since school ended and I have gotten my degree in web design, I have been working on a whole new website and two other websites. Fifty pages of coding to be done on my site.  Here is a peek at my new logo.


Hope everyone has a blessed weekend!
Happy Creating!


Tuesday, August 11, 2015

New Colored Pencil Artwork Commission Donation of Dragon Fairy

New Color Pencil Artwork of Dragon Fairy 

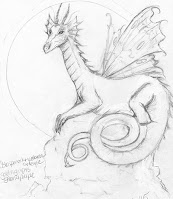
Finally done with the dragon fairy. My first attempt at a dragon fairy. The winner of this auction commission was very happy with it and this particular dragon was inspired by artist Amy Brown. I love her dragons. This piece was done in colored pencil and watercolor pencil.


Hope everyone is having a blessed week!
Happy Creating!

Wednesday, August 5, 2015

Update on New Colored Pencil Commission Donation

New Work

New commission donation of a fairy dragon. Presently working on the rocks, wings and dragon. Done in colored pencil and watercolor pencil.


Hope everyone is having a great week!
Keep on Creating! 

Tuesday, July 28, 2015

Graduation and New Commission Donation

Graduation
What seemed an eternity, I finally graduated from college in June with an A.A. degree in Computer Information Systems. It was a difficult journey, but with God's help I succeeded.


I am now working on my web design portfolio and hope to start applying for jobs next month sometime or working on starting up my own web design business. While I am working on my portfolio, I am working on commissions and new art pieces.

New Commission
I started a new commission donation piece yesterday - a fairy dragon. I will be posting the step by step on my blog here and on my Facebook page.


Hope everyone is having a great summer!!
Happy Creating Everyone!


Friday, September 19, 2014

New Colored Pencil Artwork Breast Cancer Awareness and Updates

Hey Everybody!
It's been a while since my last blog post. I have been so busy working around the house trying to get things situated and doing some deep cleaning before school starts back up again for me on the 29th I really haven't had a lot of time to draw as of late. I have a week left of vacation.  Also during the summer time, I managed to crash two laptops. Lost some of my stuff, but fortunately, I had most of the important files backed up. So, I have been without a computer most of the summer. I just got my new laptop this week and I am very happy with it. It seems to be able to handle all the adobe software quite well.
We had a great time down at Depoe Bay and Newport Oregon for our vacation in August. So much to see and do. Love watching the whales and checking out the lighthouses.


Depoe Bay

Yaquina Head Lighthouse


New Color Pencil Art Work
Well, I have pretty much finished my last work in progress "Remembering Mom" This piece is for sale at my Etsy store http://mooresart.etsy.com/
Twenty-five dollars of the sale will be donated to Susan G. Komen.
Title: "Remembering Mom"
Medium: Color Pencil and White Gel Ink


"Remembering Mom"
Medium: Color Pencil and White Gel Ink


Work In Progress
Here is my latest work in progress "Slave No More." I might change the title of this piece. It's not quite coming out like the way I was envisioning it. It's been a challenge to create and capture what I was envisioning. The idea behind this piece is the sea is parting, a pillar of cloud is behind her and the woman is one of the Israelites that God has led out of Egypt. I still have a bit more to do on this piece. I am taking a two-day break from it and to see what areas need more work on and how I will finish it up.

Medium: Color Pencil, Watercolor Pencil and White Gel Ink


Updates
Now that I have a computer again I can start working on my website. I have so many ideas for designing it that I have learned in class. I am so eager and excited to start working on it.
Also, I have a bunch new listings of artwork for sale now available at my Etsy Store http://mooresart.etsy.com/

Hope you all have a blessed weekend!
Happy Creating Everyone!

Wednesday, July 30, 2014

New Graphite Works, New Colored Pencil Work In Progress and New Colored Pencil Tutorial

New Works

First, I have a whole new background tutorial on clouds now available for purchase and download at my site.


All new work in progress for October's Breast Cancer Awareness theme. 
Medium: Color Pencil


A new graphite piece I completed that I started back in February.
Title: Sacred Promise
Medium: Graphite


And sketches from Sketchfest 52 available for sale at the sketchfest website


Art Resource of the Month

Wonderful video about CPSA signature artist Denise Howard and the techniques she uses.

Happy Creating Everyone!