Saturday, July 24, 2021
Mountain Goat Colored Pencil Work In Progress Update
Monday, July 19, 2021
Moores Art Gallery Colored Pencil Impressed Line Technique & Sgraffito
Colored Pencil Tips & Techniques:
Impressed Line & Sgraffito
It's All About Colored Pencils!
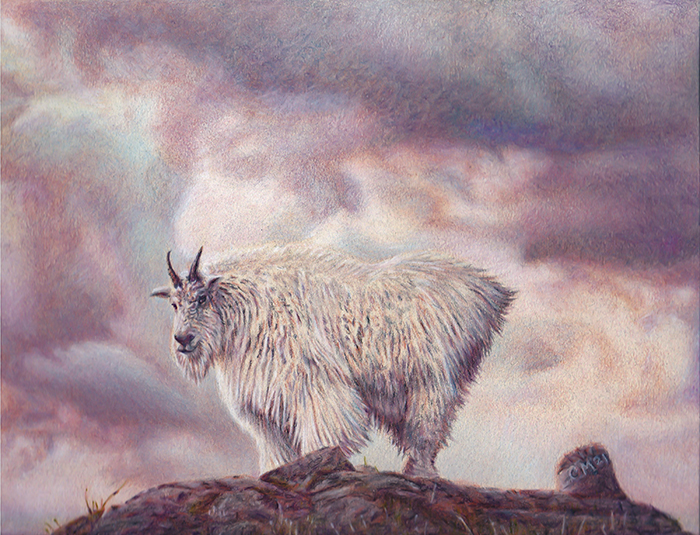
The impressed line technique is used to achieve fine white lines, such as whiskers, wispy hairs, details in flowers and leaves, and so on, by using a blunt object such as a wooden stylus to make indentations or impressions onto the surface of the paper. Once you start to apply layers of color over the impressed lines, the impressed lines of the paper will become visible.
- Be certain that the instrument you use has no sharp point, as it will tear the paper's surface.
- Make sure you mark the impressed line areas on your paper first before applying any colors.
- You can apply layers of a light color first, then make your impressed line over that layer of color.
- You may add light layers of color to the groove later if you wish.
- You can also create impressed lines with a white or light-colored pencil, revealing an impressed line of the colored pencil used instead of the color of the paper.
- Impress or indent your lines carefully, maintaining the same constant pressure throughout the length of the whisker or hair.
- Decrease pressure or indentation near the tip or end of the whisker or hair to suggest realism.
Saturday, July 10, 2021
Moores Art Gallery Blending, Burnishing and Layering Colored Pencils
Colored Pencil Tips & Techniques:
Blending, Burnishing, and Layering
It's All About Colored Pencils!
Blending
Blending is the process of layering colors and merging the layers of colors together by using layering techniques and or using a combination of blending tools. As a result, you can achieve rich photo-realistic type works.
Some Tips On Blending
- To blend colors try using a stump or tortillion. Tortillions come in 3 sizes: small, medium, and large. Stumps are very similar to tortillons but are much bigger. Blend the colors in a circular motion. Make sure you keep the tips clean if you are using them to blend selective colors.
- A colorless marker can be used to blend layers of colors together. The colorless marker consists of a colorless solvent that dissolves and melds the colored pencil pigment. The results achieved when using a blender marker can be smooth, deep, rich, lush and vivid. The marker is great for making washes, or under-paintings in colored pencil paintings. Some top-rated brands are Tombow Colorless Blender Pen, Prismacolor Colorless Blender Marker, Finesse Colored Pencil Blender Marker, or Copic Colorless Blender Marker.
- Try using makeup sponges, q-tips, or an Alvin Dry Cleaning Pad, for blending layers of color.
- Try applying a solvent, such as Gamsol mineral spirits, Turpenoid Natural, or Zest it with a q-tip or paintbrush to blend colors together.
- Colored Pencil Artist Carlynne Hershberger has discovered a "new blending tool called the Crayon Eraser." It is similar to Prismacolor Colorless Blenders, however, it does not change the saturation of the colors as the blending markers and pencils can do.
- Colored Pencil Artist, Linda Lucas Hardy uses a dry brushing technique for blending her layers of color. She applies multiple layers of colored pencil gradually, using up to heavy pressure, and then takes a stiff-bristle paintbrush or pastel brush, no longer than 1/2 inch, and blends the colors together.
- Colored pencil artist Ester Roi has invented the Icarius Drawing Board. The board has a warm side and a cool side. The warm side of the board is used for mixing, blending, and burnishing layers of colors. You use the cool side of the board to work on the details and other layering techniques.
- The colorless blender pencil is a very effective and valuable tool for blending colors, creating rich, vibrant colors, or giving layers of color a polished look. The colorless blender pencil base consists of either a non-pigmented wax or non-pigmented oil-wax that blends and burnishes the colored pencil pigment. I have used the following four colorless blender pencils to blend colors and to help in completing finishing touches on detailed areas: Prismacolor's blender pencil (PC 1077), Lyra's Rembrandt Splender Blender, Derwent Blender, and Caran d'Ache Full Blender-Bright.
Burnishing
Burnishing with colored pencils can create a beautiful rich glazed look. Burnishing is the process of layering multiple colors and then applying heavy pressure with a light-color pencil or with an artist tool. The wax then melds together and causes the drawing surface to become slick, filling up the entire tooth of the paper's surface.
For example, after layering several colors, apply heavy pressure with Prismacolor Cloud Blue . Repeat the process again if necessary until a polished or vivid effect is achieved. Burnishing is ideal for creating sparkling glass, polished surfaces, and metals. If you intend to burnish your drawing, make sure you wait until the end, as burnishing will take all the tooth out of the paper.
Some Tips On Burnishing
- Burnishing works best with a light-colored pencil, such as Prismacolor Cream, Prismacolor White, Prismacolor 10% Cool Gray, or Prismacolor Cloud Blue, apply heavy pressure over the layered colored area to be burnished.
- By burnishing with specific colors, you can achieve various effects, such as burnishing with Prismacolor Pale Ochre, you can give the illusion of an aged or antique look.
- Try using a metal scoop part of a ceramic clean-up tool, a spoon, or any other smooth metal device and apply heavy pressure in circular-like motions to the colored layers to be burnished.
- Burnish light areas first so that the dark pigment fragments do not land on unwanted areas on the surface of the paper.
- Burnish colors by using a stump or tortillion. Blend the colors in a circular motion while applying heavy pressure. Make sure you keep the tips clean if you are using them to blend selective colors.
Layering
Layering is the process of gradually building layers upon layers of colors using light to medium pressure to create different colors, values and hues. It can give your works an illusion of depth, can deepen colors, can modify colors, and can even give your work an impression of light or luminosity.
Some Tips On Layering
- Layer colors using crosshatch, horizontal, diagonal, vertical, or circular strokes. Start with a single light layer of color, then keep adding different layers of color on top of one another, using light to medium pressure, until the desired results are achieved